

Photopea is an advanced web-based image editor, which can work with both raster and vector graphics. This software is used for simple tasks, such as resizing images, as well as complex tasks, such as designing webpages, creating illustrations, processing photographs, and more. This article provides a tutorial for photopea and infographics tools also the basic idea to work with Photopea to edit the thesis images.
The Photopea website link is given below:
Photopea Tutorial
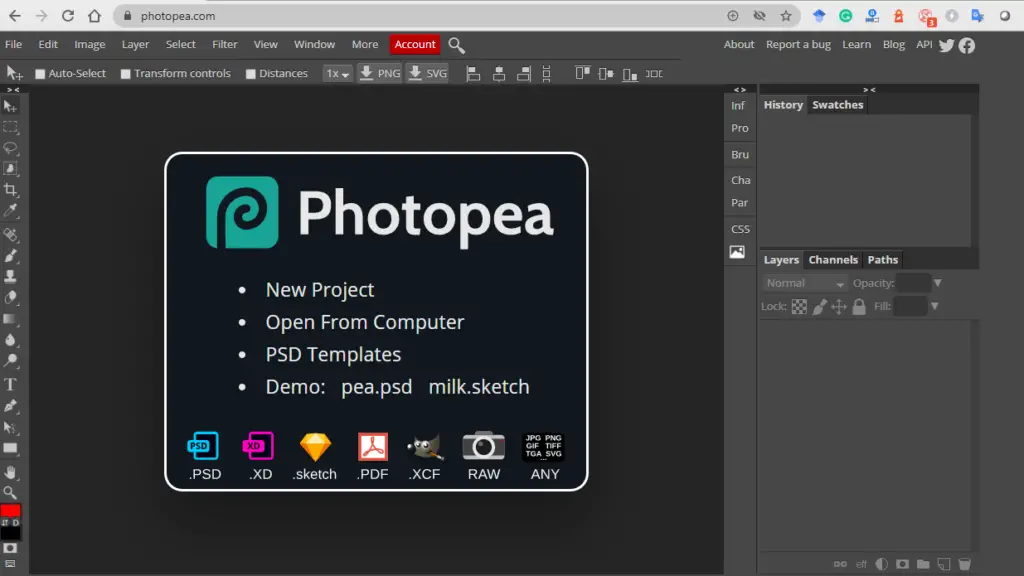
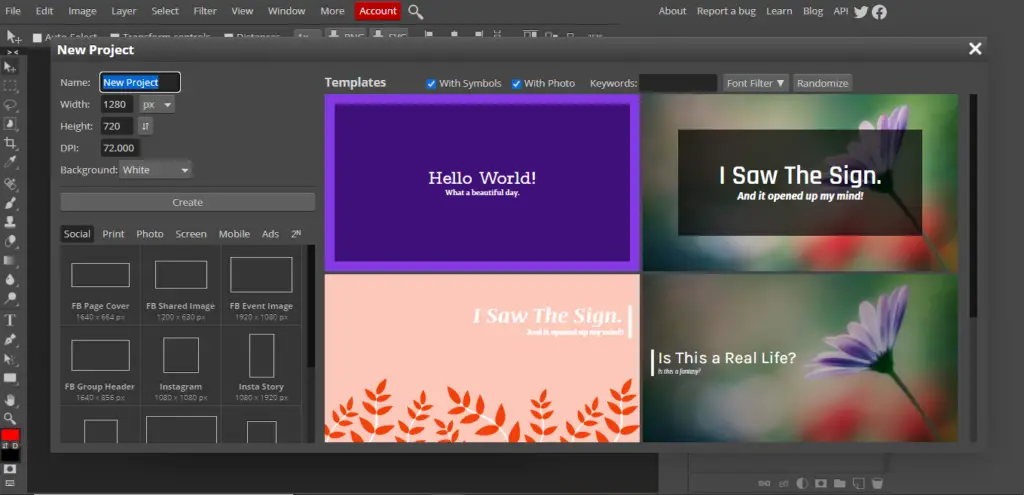
Photopea editing software provides all the necessary tools to edit the image as shown in the above figure. To start a new image editing, the new project helps to create images with a custom dimension (height x width) and resolutions (DPI). The below figure displays the new project creation in Photopea.
Concepts of layers
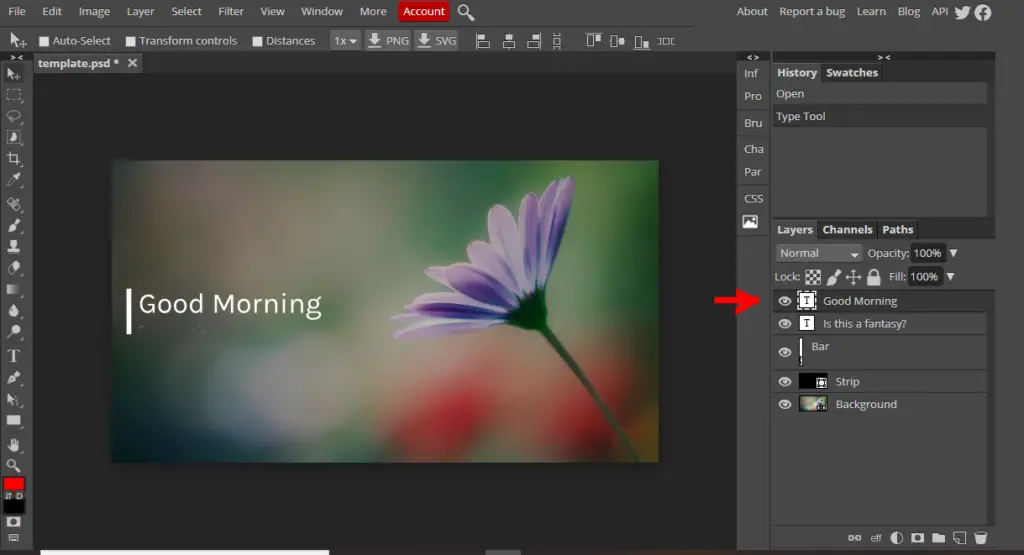
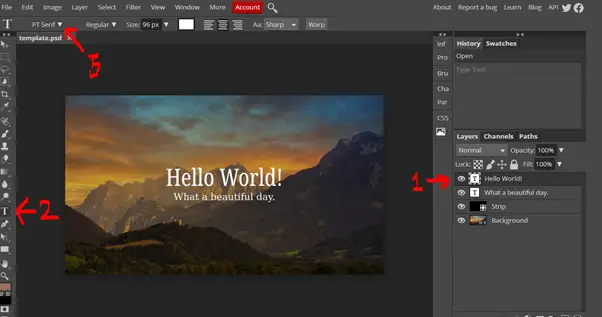
The layer represents some part of the image. It is usually an area filled with transparent, partially transparent, or opaque pixels. Each PSD document consists of layers. Layers are rendered one on top of another, to create the final image. Generally, editing can be done in one layer at a time. Changing (moving, rotating, drawing into) one layer does not affect other layers. Different layers presented in the Photopea is shown in the below figure.
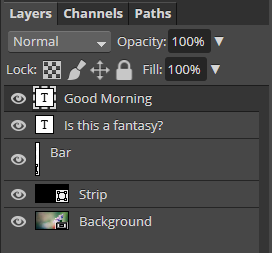
Layers panel
The layers panel is the main place for working with the layer structure of the document. It is available in the sidebar on the right. It contains the list of all layers and their thumbnails. Layers at the bottom of the list are the layers “in the back”, while layers at the top are the layers “in the front”.
When we have many layers, we need to choose one, which we want to work with. A layer can be selected simply by clicking on it (on its name or its thumbnail) in the Layers panel. The below figure shows the sample layer panel.
Sometimes we need to select multiple layers at the same time. E.g. if we want to rotate all of them by the same angle, or delete them all at once. When one or more layers are selected, hold the Ctrl key and click on other layers, to add them to the selection, or click on already selected layers (while still holding Ctrl) to unselect them.
Basic interface -Photopea Tutorial
Photopea offers many ways to manipulate layers. The basic interface with the software can be done using the move tool. Using this one can move the image, rotate, bend, etc. The Move Tool is the basic tool for moving layers and their parts. It is the first tool in the toolbar. It can be enabled temporarily by pressing the Ctrl key (after releasing Ctrl, return to the previous tool). By default, it will move all layers, that are currently selected (in the Layers panel).
If the mask of the layer is selected, and that mask is not linked to the main content, the Move tool will move the mask only. Similarly, it can move only the main content, without moving the mask. Also, it can strip the image using a stripping tool.
When the Move tool is active, move objects also with cursor keys (“arrows”) on the keyboard. One keypress will move the content by one pixel. If the Shift key is on hold, the content will be moved in ten-pixel steps.
The Move tool has the auto-select feature, which can be enabled in the top menu, or temporarily by holding the Ctrl key. With auto-select enabled, press anywhere in the image, and Photopea will automatically detect the closest layer under the cursor, and make it selected (in the Layers panel). This way, don’t have to select layers manually in the Layers panel, but it is enough to click on them.
Image filtering and color balance
Filters, pixels having the same color can be changed to different colors, as in the blur filter. When the black pixel is surrounded by white pixels, it will become white after blurring. But if the black pixel is surrounded by black pixels, it will remain black after blurring.
Filters can be applied by clicking Filters in the top menu, choosing the category of filters, and then choosing a specific filter.
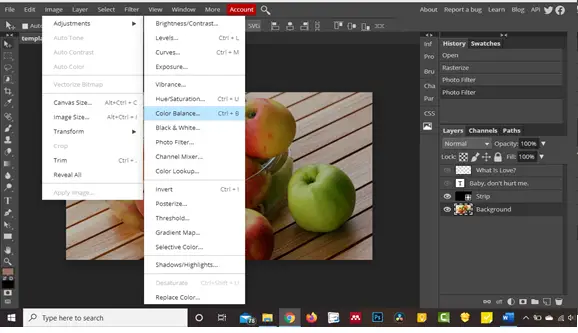
Colour Balance Adjustment Layers are used to easily colour highlights, shadows, and mid-tones individually in Photopea. Also, do colour balance (ImageàAdjustmentsàColor balance) of any image by adjusting the Red, Green, Blue colour settings.
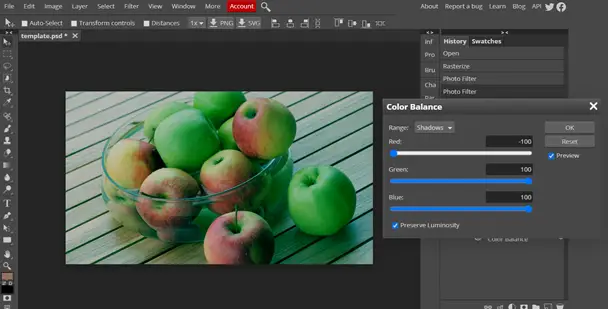
Above image shows the before and after color balance.
Template extraction
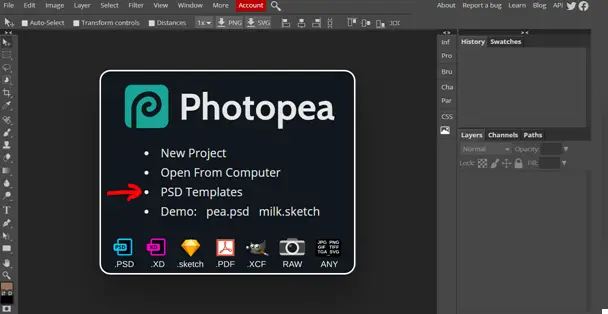
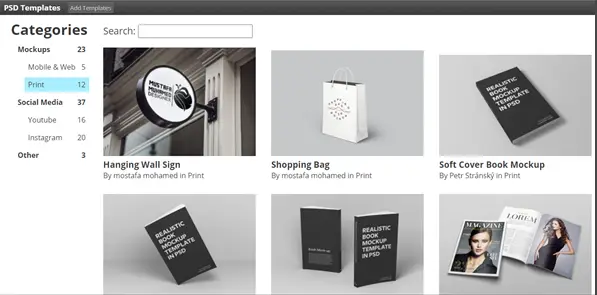
Photopea templates are the gallery of images in the PSD format which we can use for social media, blog posting, banner creating, and website designing. Access the Photopea templates using the PSD templates menu from the home page. The gallery of Photopea templates is displayed.
Typography
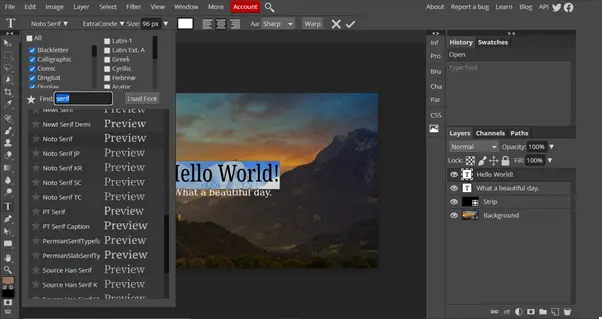
Typography is the way of arranging text to make readable, and appealing. The arrangement of text involves selecting fonts, font size, line lengths, line-spacing, and letter-spacing, and adjusting the space between pairs of letters.
To change the font type of the text in the image using Photopea, first select the text layer from the layer panel. Secondly, select the text tool from the tool panel to highlight the required text. Finally, select the font style from the list of fonts.
Infographics
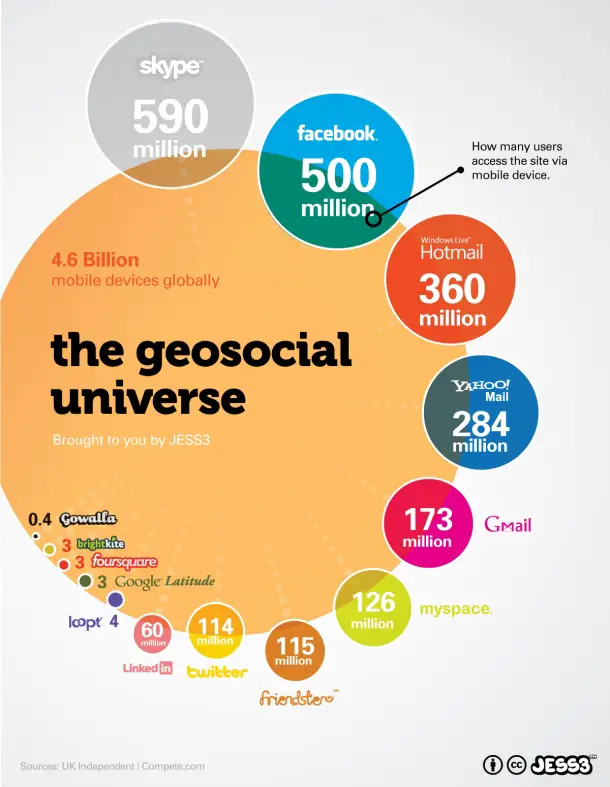
Infographics (“information” and “graphics”) are graphic visual representations of information, data, or knowledge intended to present information quickly and clearly. Infographics enhance cognition by using graphics to improve the human visual system’s ability to see patterns and trends. The sample infographic image for website users through mobile is depicted below.
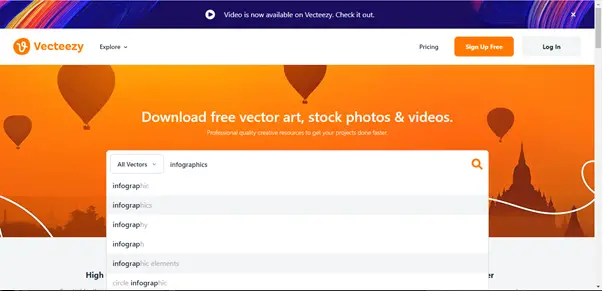
Create infographics
To create infographics, we need to download the infographic templates. Explore the following websites to download the infographic templates.
- https://www.vecteezy.com/
- https://www.freepik.com/
As shown in below figure, search and select the appropriate infographic template from vecteezy.com

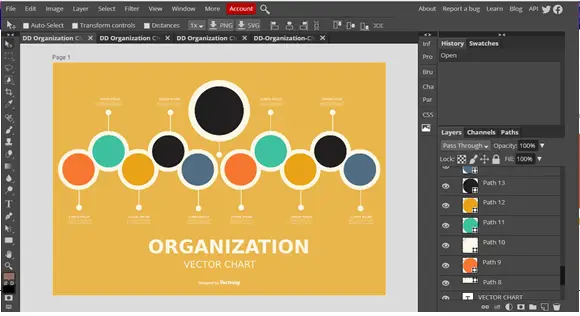
After selecting the suitable template for the content, download the template as a .zip file. To edit the infographics, upload the same .zip file into the Photopea.com website by using the menu (Open from the computer). After uploading, wait till all layers in the file to upload then edit the content in the infographic. Finally, the complete infographic can be exported in the required format.
Hope, this tutorial helps you to edit images using photopea and create infographics using vecteezy for your thesis.
